


Connect to your dreambox via SSH/TELNET and run this command "opkg install openvpn" without quotes.
After you have installed openvpn, you will need to put a configuration file into /etc/openvpn/. You can download your .ovpn files & ca.crt certificate from your VPN provider (In my case PIA) and simply rename the desired server .ovpn file you wish to use to openvpn.conf, place this and your ca.crt file into /etc/openvpn. Now create a login.conf file in the openvpn folder for your details.
The file should include just your user/pass in this format (Nothing special)
username
password
Edit your openvpn conf and edit the line auth-user-pass to auth-user-pass login.conf
Now after you have created the login and edited the vpn config paste the following command into telnet.
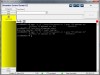
/etc/init.d/openvpn start
Leave for upto 10-15 secs.
After you do that copy and paste the command below into telnet to verify the IP address has changed.
wget -q -O - http://ip.serdit.ro | grep "IP address is"
To add openvpn to autostart paste the command below.
update-rc.d openvpn defaults
**Update**
Some free vpn services like vpnbook and such only offer a .opvpn file and putting that into /etc/openvpn on the dreambox on its own didnt work for me. Here is how I fixed it.. Edit the .opvpn you wish to use and then you will see <ca></ca>, <cert></cert> & <key></key> tags. Copy the info from between the first tags <ca></ca> and paste into a new file called ca.crt, same with the cert tags to a new file called whatever.crt & key tags to whatever.key. Then delete the tags and their info from the .opvpn file.
Still editing the .opvpn add this...
ca ca.crt
cert whatever.crt
key whatever.key
So your opvpn file should look something like...
client
dev tun2
proto udp
remote <IP> <Port>
resolv-retry infinite
nobind
persist-key
persist-tun
ca ca.crt
cert whatever.crt
key whatever.key
auth-user-pass login.conf
comp-lzo
verb 3
cipher AES-128-CBC
fast-io
pull
route-delay 2
redirect-gateway
Save, rename to openvpn.conf & upload this and your new files to /etc/openvpn.
As above, you will now have a VPN...but for free.
Tested on OpenPLi 3.0 OE2.0 DM800 Clone + TSMedia.
Enjoy your streaming. :-)
Leave a thanks if this worked for you.

Results 1 to 12 of 12
Thread: VPN On Your Dreambox
Threaded View
-
10th March, 2014, 01:31 PM #1Junior Member


- Join Date
- Nov 2009
- Posts
- 25
- Thanks

- 1
- Thanks

- 3
- Thanked in
- 1 Post
 VPN On Your Dreambox
Last edited by hitman000; 12th March, 2014 at 01:16 AM. Reason: Updated the tutorial.
-
The Following 3 Users Say Thank You to hitman000 For This Useful Post:
firestorm (11th March, 2014), Tork Motor (13th August, 2015)

 Reply With Quote
Bookmarks