

 Reply With Quote
I made a table of key / Zenovo 3ZZ-FE.pdf / for RAV4 1ZZ-FE 89661-42730 (93C56 x16), became perfectly

Results 61 to 65 of 65
Thread: Toyota corolla 3ZZ-FE Keys
-
24th October, 2013, 04:57 AM #61Member


- Join Date
- Aug 2012
- Location
- Earth-Asia
- Posts
- 77
- Thanks

- 10
- Thanks

- 4
- Thanked in
- 3 Posts

The problems is solve..Thanks
-
2nd September, 2014, 03:55 PM #62Junior Member
- Join Date
- Jun 2012
- Location
- Bulgaria
- Posts
- 22
- Thanks
- 15
- Thanks
- 3
- Thanked in
- 3 Posts
-
6th October, 2014, 03:57 AM #63Newbie
- Join Date
- Feb 2010
- Posts
- 2
- Thanks
- 0
- Thanks
- 0
- Thanked in
- 0 Posts
Here is how I've done it for a Few years now..
This is for a Toyota Spyder MRS
This is the Virgin Dump, for the Ic900.. Buffer dump
PG4UW - universal program for BK PRECISION programmers, version 2.75j/01.2011
Date: 9.June 2011 Time: 19:25:35
Selected device: Microchip 93C56 [SOIC8]
Buffer content from address: 00000000h, to address: 00000087h
Address +0 +1 +2 +3 +4 +5 +6 +7
-----------------------------------------------------------------------
0000000000 0000 0000 0000 0000 0000 0000 0000 0000
0000000008 0000 0000 0000 0000 0000 0000 0000 0000
0000000010 0000 0000 0000 0000 0000 0000 FF00 0000
0000000018 0000 0000 0000 0000 0000 FBDF 0000 0000
0000000020 0000 0000 0000 0000 0000 0000 0000 0000
0000000028 0000 0000 0000 0000 0000 0000 0000 0000
0000000030 0000 0000 0000 0000 0000 0000 7770 0000
0000000038 0000 0000 0000 0000 0000 0000 0000 0000
0000000040 0000 0000 0000 0000 0000 0000 0000 0000
0000000048 0000 0000 0000 0000 0000 0000 0000 0000
0000000050 0000 0000 0000 0000 0000 0000 FF00 0000
0000000058 0000 0000 0000 0000 0000 5A69 0000 0000
0000000060 0000 0000 0000 0000 0000 0000 FF00 0000
0000000068 0000 0000 0000 0000 0000 0000 0000 0000
0000000070 0000 0000 0000 0000 0000 0000 7770 0000
0000000078 0000 0000 0000 0000 0000 0000 0000 0000
The Two Options I have Found by searching are..
1) Remove the Chip from the ECU, and Program it in the Burner with a Virgin Code..
2) Use a 'Chip Clip' to hook to the Chip while it on the Circuit Board.. and Program it there..
My Results..
1) Upon Further reading, unless you have VERY Expensive Soldering Tools for removing the Chip from the Board.. your Chances of getting it off, and back on and NOT Broken.. are ZERO.. So I Opted to not try that..
2) Purchased a Chip Clip that was for Hooking to the Chip.. to Program.. WELL.. while the Chip is in the Board.. and the Board is Covered with the Anti Fungus Covering.. not much can get through.. Not even the Contact for the Clip.. I tried to Scratch off the Coating.. I Got the Coating Off.. but was unable to get the Clip to Conect to all 8 Pins..
So I came up with Option 3..
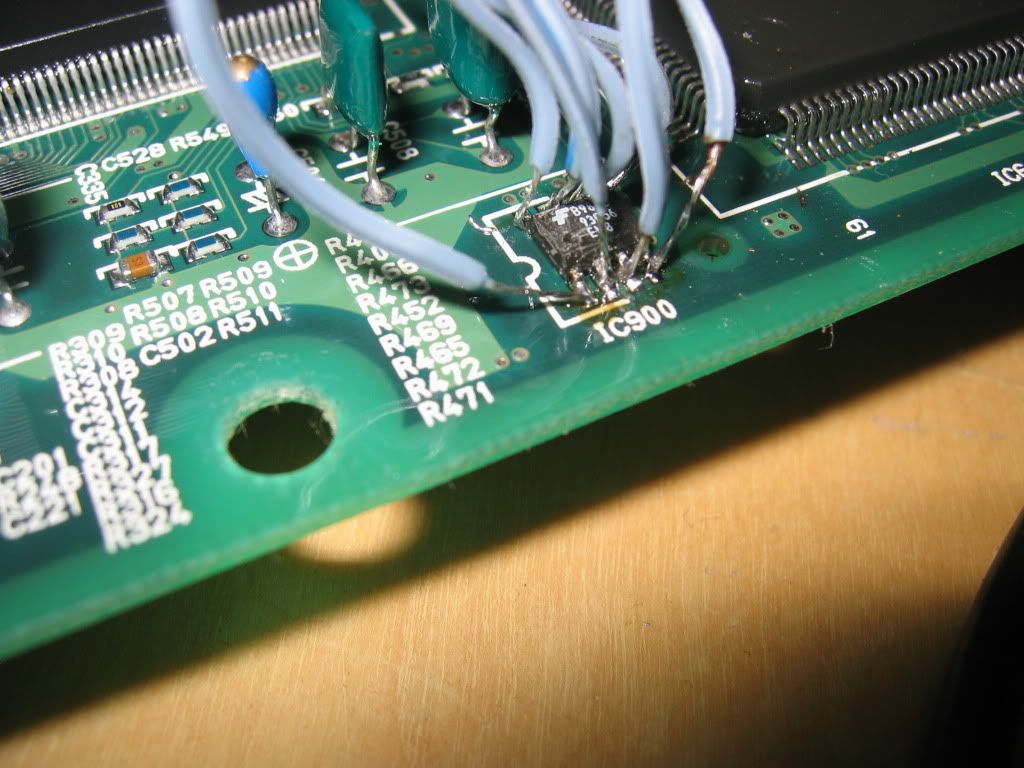
Solder Jumpers to each of the 8 Pins of the Chip.. and take the 8 Wires to a header Jumper that will Plug into the Programmer ZIF Socket..
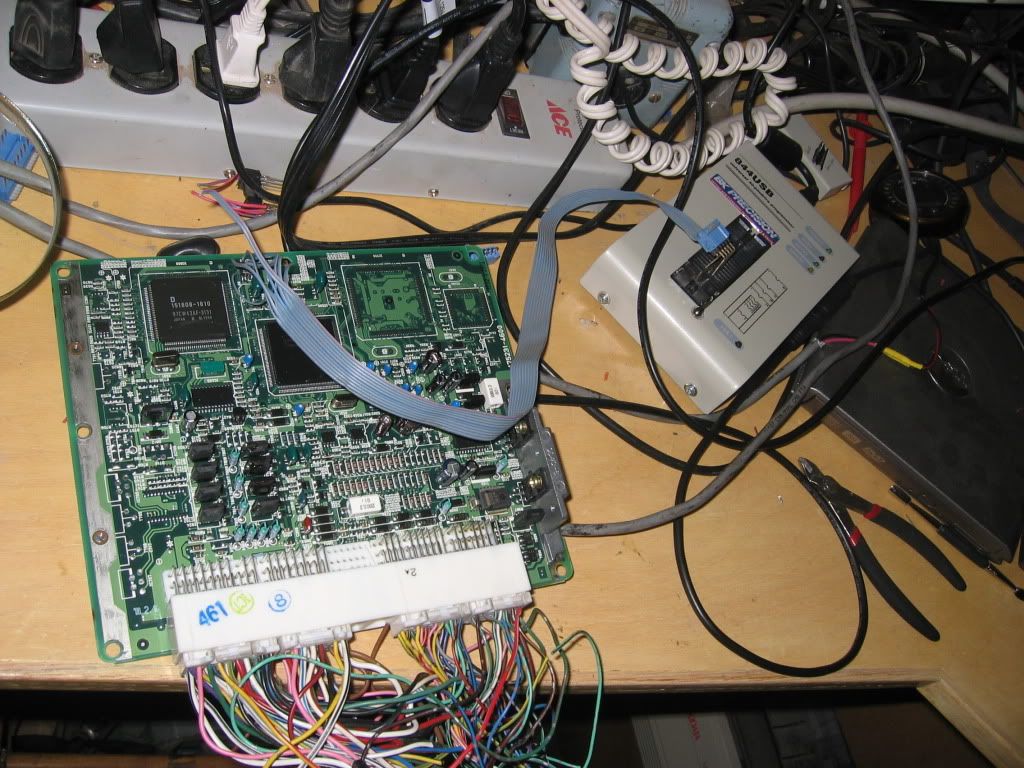
Here is the Pics..
Wires on the Chip..
Wires going to the Programmer..
I also came up with an Unusual Problem.. SOMETIMES on SOME ECU's I can not Erase/Read or Program Correctly.. Even though the Wires are Hooked up properly..
The Solution.. Power up the ECU, then Power it Down.. I have Test Plugs on the Bench.. So I can Do it from Inside the House..
Then the Chip will Read/Verify/Program with no Problems.. Not sure what that is about.. but I have a Work Around for it.. so Problem Solved..
One other problem has Surfaced.. This programmer has a default set up where it will electrically 'Taste' the leads of the E-Prom chip, to see if all is hooked up properly. As of late, the 'Taste' is different, and the Programmer thinks the leads are not hooked up properly..
The fix for this new problem, is to not 'Verify Leads' before programming.
You will need three keys for light to shut off. Two master and one valet. don't turn car on, just put the key in, wait two seconds then remove key. Add the other keys to memory by doing the same.
The First key inserted ( as long as not only one is Inserted ) will be Programmed as the Valet Key. Make sure if you have a Key that is cut as a Valet Key, it is inserted First.
Cap
-
6th October, 2014, 08:44 AM #64Moderator


- Join Date
- Jun 2009
- Posts
- 12,465
- Thanks
- 2,633
- Thanks
- 9,136
- Thanked in
- 4,304 Posts
Where there is a will, there is a way mate

-
16th April, 2015, 02:08 PM #65DK Veteran
- Join Date
- Feb 2014
- Posts
- 1,748
- Thanks
- 507
- Thanks
- 766
- Thanked in
- 526 Posts
I did a 2004 Corolla with the same ECU recently. Generally your tutorial helped me up to the part with the security LED. After flashing with virgin file and refitting the light was blinking slowly(once per second). It stayed ON only after I plugged the first key. Since I had only one key, I wanted to cut the registration procedure after the first key but nothing happened after pressing the brake 5 times. The procedure finished only after I started the engine... But never mind, the job was done Originally Posted by AUS-MAN


Bookmarks